
Hydroponics is often defined as “the cultivation of plants in
water.” Hydroponics is however a technique for growing plants without using
soil. Utilizing this technology, the
roots absorb a balanced nutrient solution dissolved in water that meets all
the plants developmental requirements.

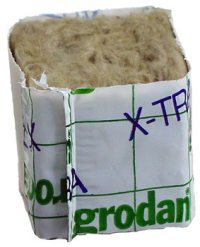
Research has determined that many different aggregates or
media can support plant growth,
therefore, the definition of hydroponics has been broadened to: “the
cultivation of plants without soil.”
ADVANTAGES OF HYDROPONICS
 As demonstrated by through research activities, including
field trials, hydroponics is a far more economical and profitable technique
than traditional agricultural cultivation.
As demonstrated by through research activities, including
field trials, hydroponics is a far more economical and profitable technique
than traditional agricultural cultivation.
Some of the advantages noted:
1.
The
possibility of obtaining more products in less time than using traditional
agriculture:
2.
The
possibility of growing plants more densely
3.
Possibility
of growing the same plant species repeatedly because there is no soil depletion
4.
Plants
have a balanced supply of air water and nutrients
5.
More
product/surface unit is obtained
6.
Cleaner
and fresher products can be reaped
7.
Production
can be timed more effectively to satisfy market demand
8.
Healthier
products can be produced
9.
Products
are more resistant to diseases
10.
Natural
or Biological control can be employed
11.
Soil
borne pests (fungi) and diseases can be eliminated
12.
Troublesome
weeds and stray seedlings which the result in the need for herbicides use and increase labour cost, canalso be
eliminated.
13.
Reduction
of health risks associated with pest management and soil care.
14.
Reduced
turnaround time between planting as no soil preparation is required
15.
Stable
and significantly increased yields and shorter crop maturation cycle
16.
Can
be utilized by families with small or no yard space
17.
When
water is used as the substrate:
a. no soil is needed
b. the water stays in the system and can
be reused - thus, lower water costs
c. It is possible to control the
nutrition levels in their entirety - thus, lower nutrition costs
d. No nutrition pollution is released
into the environment because of the controlled system
18.
Pests
and disease are easier to get rid of because of container mobility
DISADVANTAGES OF HYDROPONICS
1.
Commercial
Scale requires technical knowledge as well as a good grasp of the principles.
2.
On
a commercial scale the initial investment is relatively high.
3.
Great
care and attention to detail is required, particularly in the preparation of
formulas and plant health control.
4.
A
constant supply of water is required
Crop
(No. of harvests a year using hydroponics)
|
Yield using soil
(tons per hectare at harvest time)
|
Yield using hydroponics
(tons per hectare at harvest time)
|
Lettuce
(10)
|
52
|
300-330
|
Tomato
(2)
|
80-100
|
350-400
|
Cucumber
(3)
|
10-30
|
700-800
|
Carrot
(1)
|
15-20
|
55-75
|
Potato(1)
|
20-40
|
120
|
Peppers(3)
|
20-30
|
85-105
|
Cabbage(3)
|
20-40
|
180-190
|
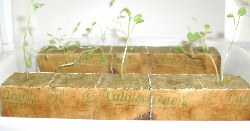
PRODUCTION SYSTEM
Hydroponics can be classified as:
- Open system; or
- Closed system
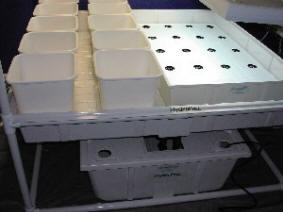
OPEN SYSTEM:
In the open system of hydroponics, the nutrient solution is
mixed and applied to the plant as
required, instead of being re-cycled. Examples of some open system are:
- growing beds
- columns made out of
tubular plastics or vertical and horizontal PVC pipes
- individual
containers e.g. pots, plastic sacks and old tires
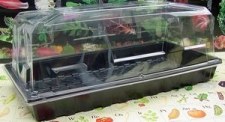
CLOSED SYSTEM:
In this system the nutrient solution is circulated
continuously, providing the nutrients that the
plant requires. Examples of closed systems include:
- Floating roots
- Nutrient Film
Technique (NFT)
- PVC or bamboo
channels
- Plastic or
polystyrene pots set up in columns
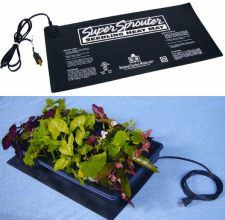
MAJOR REQUIREMENTS THAT A HYDROPONICS SYSTEM MUST SATISFY
- Provide roots with a
fresh, balanced supply of water and nutrients
- Maintain a high
level of gas exchange between nutrient solution and roots
- Protect against root
dehydration and immediate crop failure in the event of a pump failure or power
outage.
LOCATING A HYDROPONIC GARDEN

1.
Avoid
heavily shaded, windy and extremely sunny places.
2.
Keep
the garden protected from domestic animals and pets.
3.
The
planting space must receive a minimum of six hours sunlight.
4.
Must
be close to a source of water and the place where the nutrients are kept.
5.
It
must be kept far from contaminated water.
6.
It
must be kept far from trees and other plants that are affected by pests and
diseases.
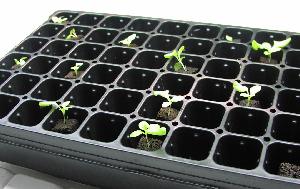
SIZE OF THE HYYDRONNICS GARDEN
1.
Space
is not an important factor in hydroponic gardening.
2.
A garden
can be set
up in spaces
as small as
1m². Most of
hydroponic gardens are
any size between 10 to 20m², but
some families are able to keep gardens as big as 200m².
3.
Within
as small space, one may produce enough vegetables that will be nourishing and
free of pollutants.


.jpg)